My alternator died. At least one of the diodes in the recifier no longer blocks reverse current. This allows current from the battery to flow through the alternator to ground while the car was switched off. I measured a 350mA drain, which is enough to drain the battery after a couple of days. Some people have suggested that you can detect such current drains by striking the battery clamp on the battery terminal and looking for sparks. I tried this and observed no sparks, but the mulitmeter definatly shows 350mA. The spark method will work, but you obviously need more current.
I could quite easily replace the diodes in the alternator, but the standard Lucas 16ACR alternator is fairly weedy. It is only capable of about 30A total output, and at idle it produces nowhere near enough current to drive all the electrics. I have experianced electrical failure after driving in stop start traffic for too long with the lights and heater on.
I went boneyard hunting, and spent far too long looking around the Pick-a-Part for a suitable donor. There were only a few alternators that seemed to be in good condition in the yard. Well, I judged that by how clean they were. If they were too dirty or corroded, then I figured they had been there too long and might not work... I don't know how valid this criteria is, but it worked.
I settled on a Toyota Corona Turbo Mark II as a donor car. It had a Nippondenso alternator and it looked fairly easy to remove. It wasn't, but it eventually came out. I payed the princly sum of NZ$21 for it and took it home. It was only then that I examined it more closely. Disaster! All alternator guides on the net talk about 4 connection alternators, but this alternator has 5 connections!
After some significant websearching I found the answers:
| L | - | Lamp | - connect via the warning lamp to +12v |
| S | - | Sense | - connect to +12v |
| IG | - | Ignition | - connect to ignition switched +12v - this provides about 250mA to drive the regulator |
| B | - | Battery | - the main current connection - connect to the battery positive via heavy duty wire |
| Case | - | Ground | - the alternator grounds through the case |
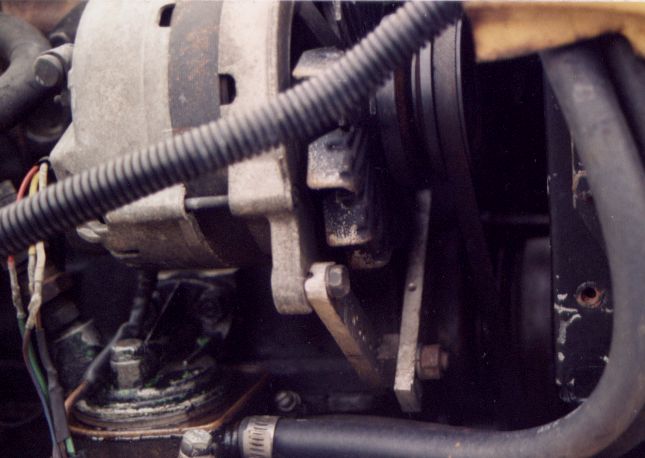
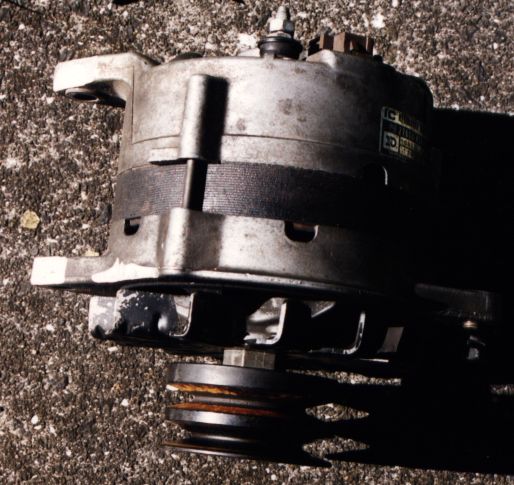
Physically mounting the alternator to the mini engine required a bit of work but was not that difficult. I had to grind a little off the top mount ears, and I had to make a bracket to connect the bottom swing arm to the bottom ear. I will put up pictures later, when the film is finished. The pulley used on the Corona has provision for two belts, the outer groove nearly lines up with the waterpump and crank pullies, but not quite. I ran the pully about half a belt-width out of alignment for maybe 2000km. The belt wasn't too happy about it. You can see a nut used as a spacer on the shaft between the pulley and the cooling fan. I had to turn the inside thickness of the pully in order to get enough shaft through it to hold it all together. I had to use a longer belt than the one that was on the car when I removed the old Lucas alternator. I hunted around in the garage and found a slightly longer belt. I only have mini fan belts, so I guess not all brands have the same lengths.
The wiring was easy, with a little solder and heatshrink to make the connections between the wires in the mini loom (cut off from the Lucas plug) and the wires from the plug I swiped from the donor car. I replaced the main charge wire with new 4 gauge cable as I don't really want to set fire to the original wire which is designed for the 16ACR's 30A.
The old Lucas alternator was unable to keep up with the electrical load at idle. I have an electric fan, electric fuel pump, and a high energy ignition. All of this draws about 15A, and at idle the alternator can only deliver about 5 or 10A. The new alternator is different. At 1000rpm it can not only provide that 15A to drive everything, it can also provide another 15A to charge the battery. I've the highest charge I've seen is about 25A for a short period. The battery will only draw so much charge when it is flat, so the alternator will only provide what the battery will accept. I don't know what the rated output of this alternator is, but it definatly does the business. The goal was to have something that does not drain the battery at idle, and this alternator is a success.
I can highly recommend this conversion to anyone with charging problems. I will add pictures to this page when I have them, but it could be several months... If you attempt such a conversion, it is obvious where you have to grind on this particular alternator, so I'm sure you won't have too much trouble.